Creality Slicer Download Guide for Ender 3 and Other Printers
Creality Slicer is one of the most widely used slicing tools in the 3D printing community, especially among users of Creality printers like the Ender 3 series. If you are looking to improve print quality, optimize settings, and get smoother results, understanding how to properly perform a Creality slicer download and set it up is essential.
This guide will walk you through everything you need to know, including installation, setup, compatibility, features, and optimization tips for different printers. Whether you are a beginner or an advanced user, this article will help you get the most out of your slicing software.
What Is Creality Slicer and Why It Matters
Creality Slicer is a software tool designed to convert 3D models (STL, OBJ, etc.) into G-code that 3D printers can understand. It is based on Cura, but modified and optimized specifically for Creality printers like Ender 3, Ender 5, and CR-series machines. This makes it a preferred choice for users who want better compatibility and easier setup.
When you perform a creality slicer download, you are getting a ready-to-use environment tailored for Creality hardware. This reduces the need for manual configuration and helps beginners avoid common printing issues such as warping, stringing, or poor bed adhesion.
Another key advantage is the pre-configured printer profiles. Instead of manually entering settings, users can simply select their printer model and start slicing. This saves time and ensures more consistent print results across different projects.
How to Complete Creality Slicer Download Safely
To begin your creality slicer download, always use the official Creality website or trusted sources. This ensures you get the latest version without malware or corrupted files. Once on the official page, choose the version compatible with your operating system, such as Windows or macOS.
After downloading the installer, run the setup file and follow the on-screen instructions. The installation process is straightforward and usually takes only a few minutes. Make sure your computer meets the minimum system requirements for smooth performance.
Once installed, launch the software and select your printer model, such as Ender 3 or Ender 3 V2. This step is important because it automatically loads optimized settings that match your printer hardware.
Setting Up Ender 3 After Creality Slicer Download
After completing your creality slicer download, the next step is configuring your Ender 3 printer. Start by selecting “Add Printer” in the software and choosing Ender 3 from the list. This ensures your build volume, nozzle size, and firmware settings are correctly matched.
Next, calibrate your print settings, including bed temperature, nozzle temperature, and print speed. The Ender 3 typically performs well with PLA at 200°C nozzle temperature and 60°C bed temperature. However, these settings can vary depending on filament type and environmental conditions.
It is also important to perform a test print after setup. A simple calibration cube helps verify if your slicing settings are correct. If issues arise, you can easily adjust parameters in the slicer before starting larger projects.
Key Features You Get After Creality Slicer Download
One of the main benefits of a creality slicer download is access to optimized slicing features such as layer height control, infill customization, and support generation. These features allow users to fine-tune print quality based on their project needs.
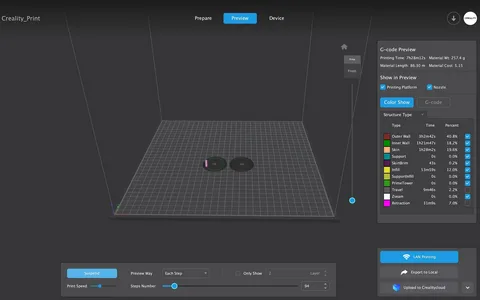
The software also includes advanced preview options that show how the model will be printed layer by layer. This helps identify potential errors before printing, saving both time and filament. Additionally, users can adjust speed settings to balance quality and efficiency.
Another useful feature is support generation. Creality Slicer can automatically create supports for complex models, ensuring better overhang performance. Users can also manually customize support placement for more precise control
Optimizing Print Quality with Creality Slicer Settings
After completing your creality slicer download, optimizing your settings is key to achieving professional-quality prints. Start by adjusting layer height—smaller layers improve detail, while larger layers reduce print time.
Print speed is another critical factor. For Ender 3 printers, a moderate speed of 50–60 mm/s is generally recommended. Slower speeds can improve quality, especially for detailed models, while faster speeds are better for prototypes.
Infill density also plays an important role. A 10–20% infill is sufficient for most standard prints, while functional parts may require 40% or more. Balancing infill, speed, and temperature ensures stronger and cleaner results.
Troubleshooting Common Issues After Creality Slicer Download
Even after a successful creality slicer download, users may encounter issues such as stringing, warping, or failed prints. These problems are usually related to incorrect temperature or retraction settings rather than the software itself.
If you notice stringing, try increasing retraction distance or lowering nozzle temperature slightly. For warping, ensure the print bed is properly leveled and heated to the correct temperature before starting the print.
Another common issue is layer shifting, which can occur due to loose belts or high print speeds. Reducing speed and checking mechanical components of your Ender 3 can often resolve this problem quickly.
Conclusion
Performing a proper creality slicer download is the first step toward achieving high-quality 3D prints with Ender 3 and other Creality printers. The software offers powerful slicing tools, optimized printer profiles, and user-friendly features that make 3D printing more accessible for beginners and efficient for advanced users.
By understanding installation, setup, and optimization techniques, you can significantly improve your print results and reduce errors. With the right settings and regular calibration, Creality Slicer becomes an essential tool in any 3D printing workflow.

Leave a Reply
Want to join the discussion?Feel free to contribute!