What Are YouTube Timestamps, And How To Use Them?
If you wish to make your content stand out on YouTube, then it is imperative for you to understand timestamps. Whether you are looking at a video, a podcast, or even a transcription, understanding the usability of a timestamp allows you to navigate the content with ease. This guide will tell you what YouTube Timestamp is and why it is important for your YouTube content.
What is the Meaning of a YouTube Timestamp?
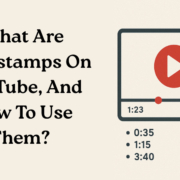
Timestamps are important aspects of your YouTube content, as they work like signposts. If you want to highlight specific moments in your audio, video, or transcripts, you can use Timestamps for the identification process. Timestamps usually follow a specific format, and you will find them written as hours, minutes, and seconds (HH:MM:SS). Sometimes, timestamps also include a datestamp, which can be written in any of the formats used to write dates (yyyy-mm-dd, mm-dd-yyyy, or dd-mm-yyyy).
Most of the time, time stamp YouTube allows users to directly jump to the specific portion of the video that they want to see or hear, rather than watching the entire content. This ensures that users can easily skip all irrelevant sections and save time. If a creator has added timestamps in transcriptions, then this means that they are tagging essential moments, allowing people to locate quotes easily.
What is the Process To Add Youtube Timestamps to your Video?
Whether you are interested in adding time tags to your YouTube video or the transcription for the same, the entire process is highly simple, and you do not need to worry about the same. There are certain specialised editing tools and software that can be used by people to add time tags in a video.
Even YouTube Studio allows people to add timestamps with ease, and you can use the process that we are mentioning here to add time tags without any issues. Before starting the process, you need to determine which portion of your video you want to identify specifically with the assistance of a time tag, and keep in mind that every portion should be at least 10 seconds long. Keep a note of the exact time of the section in minutes and seconds, and start the instructions specified below.
- Pick the video that you want to timestamp in YouTube Studio, and hit the Edit button.
- Now, you need to move to the description box and specify the timestamps by writing them. Make sure that you are starting the first timestamp with “0:00” to turn on the feature.
- Mention the YouTube timestamp link in chronological order, and you should also add a brief label with every tag for better clarity in the manner that we have mentioned here.
- 0:00 Introduction
- 1:45 Key Topic 1
- 3:20 Key Topic 2
- 5:10 Conclusion
- Once you have added all the stamps, all you need to do is save the video and update it.
These are the exact steps that you need to adhere to when you wish to add timestamps to your YouTube videos. You can also refer to the website Getassist to learn more about Timestamps and how you can use them for enhanced engagement.