You know that little pile of fuzz that collects in your dryer’s lint trap? Yeah, that stuff. It doesn’t seem like a big deal, right? But here’s the thing—when you ignore it, it builds up fast. That innocent-looking fluff can mess with your dryer’s performance, raise your energy bill, and even put your home at risk. At Clovis Cleaning Dryer Lint Trap, we’ve seen it all: dryers overheating, clothes taking ages to dry, and even near-fire situations… all because someone thought, “Eh, I’ll clean it next time.” So, how often should you actually schedule a professional lint trap service in Clovis? The answer isn’t one-size-fits-all, but we’re about to walk you through it with straight talk and no fluff (pun intended).
1. Weekly Wipe or Yearly Deep Clean? Understanding the Levels
Let’s clear this up—there’s everyday maintenance, and then there’s professional cleaning. If you use your dryer frequently (think 4+ loads per week), you should be checking and emptying your lint trap after every load. That’s your job. But once you’ve done your part, there’s still hidden lint hanging out deeper inside the trap slot and vent system that only a pro can safely reach. That’s where we come in. At Clovis Cleaning Dryer Lint Trap, we usually recommend scheduling a professional lint trap service once every 6 to 12 months, depending on your usage. If you have pets, a big family, or you notice your dryer heating up too much, you’re definitely leaning toward the 6-month side.
2. The Clovis Factor: Why Location Actually Matters
Here’s something most people overlook: Clovis weather can influence how often your dryer needs service. How? Well, Clovis has dry, dusty conditions most of the year. That means extra fine particles often sneak into your laundry—even if you can’t see them. Add that to the regular lint your clothes shed, and you’ve got a recipe for faster build-up inside the vent system. So if you’re living in Clovis, you’re not just dealing with lint. You’re dealing with lint + dust = more frequent cleanings. That’s why a lot of our regular customers book their lint trap cleanings every 6 months like clockwork.
3. What Happens When You Wait Too Long? The Warning Signs
You don’t always need a calendar reminder to tell you it’s time to call Clovis Cleaning Dryer Lint Trap. Sometimes, your dryer will start talking to you—well, not literally, but you’ll notice things like:
Clothes still damp after one full cycle
The dryer feels way hotter than usual
A burning smell when the dryer runs
Your laundry room feels unusually humid
Your energy bill creeping up with no good reason If you notice any of those signs, chances are your lint trap or internal vent is clogged. And that’s not just a nuisance—it’s a safety issue. Dryer fires are a real risk when airflow is restricted by packed-in lint. Scheduling a cleaning now is way cheaper than replacing your dryer (or worse, calling the fire department).
4. How Often Is Enough? Let’s Break It Down
We’ve put together a simple table to help you figure out how often you should schedule your Clovis dryer lint trap service based on how your household runs:
Household Type
Dryer Usage
Recommended Service
Single or couple
2–3 loads/week
Once a year
Small family
4–6 loads/week
Every 8–10 months
Large family or pets
Daily or more
Every 4–6 months
Airbnb or rental property
High turnover laundry
Every 3–4 months
Allergy-sensitive home
Any level
Every 6 months (due to dust/lint)
This isn’t a hard rule—but it’s a reliable starting point. Think of it like an oil change for your dryer. You could skip it… but it’s not gonna end well.
A Little Quote from Our Team
“A clean lint trap doesn’t just save your dryer—it protects your home, your wallet, and your peace of mind.” We’ve said that so many times, we should put it on a t-shirt. But really—it’s true. Clean dryers run better, use less power, and lower your risk of a fire. It’s not just about maintenance; it’s about safety
Conclusion: Mark Your Calendar, Save Yourself the Stress
We get it—life’s busy, and a dryer lint trap isn’t at the top of your to-do list. But when your dryer isn’t drying right or your electric bill starts climbing for no clear reason, that forgotten trap becomes a major headache. Here’s the bottom line: Schedule a professional lint trap cleaning with Clovis Cleaning Dryer Lint Trap every 6 to 12 months, depending on your dryer use and how dusty your environment is. Listen to the signs your dryer gives you, and don’t wait until something goes wrong. And hey—if you’re not sure when your last service was, that probably means you’re due. Give us a call, and let’s make sure your dryer runs smoother, safer, and smarter. Read More: Clovis Dryer Vent Cleaning
https://rmconnection.com/wp-content/uploads/Best-Clovis-Cleaning-Dryer-Lint-Trap-in-2026.jpg960720misus22/wp-content/uploads/2020/02/logo-mockup-1.pngmisus222025-07-15 10:38:402025-07-16 01:31:16How often should you schedule a Clovis cleaning dryer lint trap service for optimal performance
If you’ve ever wondered why your air conditioner stops blowing cold air or starts making strange noises, you’re not alone. Many Auburn residents run into AC troubles, especially during those surprisingly hot spring days. Often, the culprit is a dirty coil hiding inside your AC unit. But how exactly does the whole cleaning process work, and why does it matter? Grab a cool drink, and let’s dive into the world of Auburn Air Duct Cleaning and the magic of AC coil cleaning in 2025!
Unmasking the Coil: Why It Really Matters
Picture your air conditioner’s coil as the superhero cape of your cooling system. It doesn’t look flashy, but it does all the heavy lifting. Over time, dust, pollen, pet hair, and even the occasional spider web can settle on these coils. That layer of grime acts like a blanket, forcing your AC to work overtime just to keep your home comfortable. When the coil gets too dirty, your system uses more electricity, cools less efficiently, and can even break down sooner.
In Auburn, with its mix of leafy neighborhoods and pollen-heavy springs, it’s easy for these coils to clog up faster than you’d think. So, regular cleaning isn’t just a suggestion—it’s a smart way to keep your energy bills in check and your indoor air feeling fresh.
Step-By-Step: How Pros Clean an AC Coil in Auburn
Wondering what really happens when a technician shows up to clean your AC coil? It’s not rocket science, but there’s a real art to doing it right. Here’s a peek behind the curtain:
Power Down: The first move is always safety—turning off the system so nobody gets zapped.
Peek Inside: The outer panel is opened, revealing the coil tucked inside, sometimes looking like a dust bunny convention.
Dry Brushing: Using a gentle brush, the tech sweeps away loose debris, pet hair, and big dust clumps.
Foaming Cleaner: A special cleaner (it looks a bit like shaving cream) is sprayed onto the coil. It bubbles up, grabbing the grime.
Rinse and Shine: After letting the foam do its thing, the coil gets a careful rinse, washing all the gunk away.
Final Check: Once everything’s dry, the system is closed up, powered on, and checked to make sure it’s running like new.
It sounds simple, but skipping steps or rushing can mean missing hidden pockets of dirt—so having a pro do the job can really pay off.
2025 Trends: What’s New in Auburn’s AC Coil Cleaning?
Fast forward to 2025, and coil cleaning in Auburn isn’t what it used to be. Smart sensors inside newer AC units can now alert homeowners (and technicians) when the coil’s getting too dirty, so you don’t have to guess. Eco-friendly cleaners are the new standard, keeping harsh chemicals out of your home and the environment.
Somelocal technicians even use tiny cameras to make sure no dirt is left behind, and you’ll get a video or photo after every cleaning—pretty cool, right? Scheduling is easier too, with online booking and real-time updates to let you know when help is on the way.
How Often Should You Clean Your AC Coil?
Home Situation
Recommended Cleaning Frequency
Reason
Pet Owners
Twice a Year
Pet hair and dander build up quickly.
Allergy Sufferers
Every 6 Months
Keeps pollen and dust at bay.
Standard Home
Once a Year
Prevents energy waste and breakdowns.
Near Construction
2–3 Times a Year
Extra dust from nearby projects.
“A clean coil might go unnoticed, but you’ll feel the difference every time you step inside on a hot Auburn afternoon. It’s the behind-the-scenes hero of home comfort.”
FAQs About AC Coil Cleaning in Auburn
Q: Can I clean my AC coil myself? A: You can gently brush off some dust, but deep cleaning is best left to the experts. They have the right tools, safe cleaners, and know how to avoid bending the delicate fins.
Q: How long does a typical coil cleaning take? A: Most jobs take about 45 minutes to an hour, depending on how dirty things are. If your system hasn’t been cleaned in years, it might take a bit longer.
Q: Will cleaning the coil lower my energy bill? A: Absolutely! A clean coil lets your AC run easier, so it uses less electricity and cools your home faster.
Q: What signs should I look for that my coil needs cleaning? A: If your AC is blowing warm air, running constantly, or you hear odd noises, it’s probably time for a cleaning.
Conclusion
In Auburn’s ever-changing climate, keeping your AC coil clean can make all the difference between a stuffy house and a cool, refreshing home. With new technology and smarter service options, it’s easier than ever to stay ahead of dust and dirt in 2025. So, next time your air feels a little less crisp or your energy bill sneaks up, remember that a clean coil might be the answer. And if you want it done right, the folks at Auburn Air Duct Cleaning know all the ins and outs of AC coil cleaning—making sure you stay cool, comfortable, and worry-free!
https://rmconnection.com/wp-content/uploads/Auburn-Air-Duct-Cleaning-2.jpg7361312auburnairductcleaning/wp-content/uploads/2020/02/logo-mockup-1.pngauburnairductcleaning2025-06-16 00:28:212025-06-16 00:29:20How Does AC Coil Cleaning Work In Auburn In 2025?
Discovering a curious raccoon or a family of birds has made your chimney their home can be both surprising and stressful. Here in Ann Arbor, many homeowners face this challenge, especially during spring or fall. But how exactly do professionals get those animals out safely without hurting them or causing chaos? Today, I’ll walk you through the common—and not so common—tools used for chimney animal removal. If you’re looking for a friendly, local expert, Ann Arbor Chimney Sweep has plenty of experience with Chimney Animal Removal.
Nets, Poles, and Gentle Persuasion
When it comes to coaxing a squirrel or bird out of a chimney, the first things that usually come out of the professional’s kit are different types of nets and extending poles. These aren’t the big fishing nets you might imagine, but more like soft, fine-mesh nets attached to telescoping sticks. The idea is to guide or gently scoop the animal without causing it stress or injury. The poles can stretch pretty far, making it possible to reach deep into the flue without anyone having to crawl in themselves.
Sometimes, a little persuasion is needed. Animal removal experts might use a gentle tap or a soft, padded brush on the end of a pole to encourage the animal to climb out on its own. This is especially helpful for baby raccoons or ducklings that might be stuck or hesitant to move. The goal is always to get them out safely and calmly, minimizing panic for both the animal and the homeowner.
Live Traps and Why They Matter
Not every animal will cooperate with nets or “please leave” tactics. That’s where live traps come into play. These are small cages, often made of wire mesh, that can be placed at the top or bottom of the chimney opening, depending on where the animal is hiding. The traps are baited with tempting snacks like fruit or peanut butter, and once the animal steps inside, the door closes gently behind it.
Live trapping is a humane way to remove animals like raccoons, squirrels, or even the occasional opossum. It’s important that these traps are checked frequently—the last thing anyone wants is a scared animal left waiting too long. Once the visitor is caught, it’s relocated to a safe area far away from your home, following local wildlife guidelines.
“Successful animal removal is never about force. It’s about patience and respect—both for the animals and the people living in the home.”
Chimney Inspection Cameras: Seeing the Unseen
Sometimes, you can hear scratching or flapping inside your chimney but have no idea where the animal is hiding. This is when chimney inspection cameras become invaluable. These are small, flexible cameras attached to long cords that can snake down the chimney. The live video feed helps pinpoint exactly where the animal is, what kind it is, and how best to get it out.
The camera doesn’t just help find animals—it also shows if there’s a nest, babies, or even damage that needs repairing. This way, nothing is left to guesswork, and the removal process goes smoothly. Plus, homeowners often find it fascinating (and a little unbelievable) to see real-time footage of what’s happening inside their own chimney!
Sealing the Deal: Chimney Caps and One-Way Doors
Getting the animal out is just step one—the next critical task is making sure it doesn’t come back. For this, chimney professionals often recommend installing a chimney cap. These sturdy covers fit over the top of the chimney, blocking animals, leaves, and rain. Some caps have mesh screens to keep out even the tiniest birds or bats.
In cases where animals are still inside, a clever tool called a “one-way door” is sometimes used. This device lets animals exit the chimney but blocks them from re-entering. It’s an effective, humane way to evict persistent guests without trapping them inside.
Tool
Purpose
Pro Tip
Extendable Net
Gently catch or guide animals out
Always use soft mesh to avoid injury
Live Trap Cage
Humanely capture stubborn critters
Check traps every few hours
Inspection Camera
Locate animals and nests inside flue
Double-check for babies before removal
One-Way Door
Allow animals out, block re-entry
Perfect for squirrels and raccoons
Chimney Cap
Prevents future animal entry
Install after removal to avoid repeats
Frequently Asked Questions
Q: What kinds of animals usually get stuck in Ann Arbor chimneys?
A: Mostly raccoons, squirrels, starlings, and the occasional duck or bat. Sometimes, entire families can end up inside, especially in spring.
Q: Are animals harmed during removal?
A: No, professionals use gentle tools and techniques to get animals out safely, then relocate them following local wildlife rules.
Q: Do I need to clean my chimney after animals have been there?
A: Absolutely. Animals and nests can leave behind messes and even cause blockages or fire hazards. Get a thorough cleaning after removal.
Q: How do I stop animals from getting in again?
A: The best way is to install a chimney cap with a mesh screen. It keeps critters out while letting smoke escape.
Conclusion
Dealing with unexpected guests in your chimney doesn’t have to be overwhelming. With the right mix of nets, cameras, live traps, and preventive tools like caps and one-way doors, professionals can handle almost any situation smoothly and humanely. If you’re hearing odd noises or suspect you have a furry or feathered visitor, don’t try to tackle it alone—call in the experts. With help from the team at Ann Arbor Chimney Sweep, your Chimney Animal Removal will be safe, quick, and worry-free.
https://rmconnection.com/wp-content/uploads/Ann-Arbor-Chimney-Sweep-3.jpg7361312annarborchimneysweep/wp-content/uploads/2020/02/logo-mockup-1.pngannarborchimneysweep2025-06-14 04:43:022025-06-14 04:47:05What Tools Are Used For Chimney Animal Removal In Ann Arbor?
Imagine waking up to gentle scratching or tiny chirps echoing from inside your chimney. In Wenatchee, it’s not uncommon for animals like raccoons, squirrels, or birds to find their way into chimneys, especially when they’re looking for a cozy spot to raise their babies. While these surprises can be cute, they also mean your fireplace isn’t safe to use—and the animals themselves are in real danger. Today, I want to walk you through how the pros handle the delicate job of removing baby animals from chimneys, step by step, with care for both the animals and your home. If you’re ever in this situation, Wenatchee Chimney Sweep is your go-to forChimney Animal Removal done right.
First Glance: Assessing the Chimney Situation
The very first thing any responsible chimney sweep does is figure out exactly what’s happening inside. When animals are involved—especially little ones—rushing in is never a good idea. Instead, the team will ask you a few questions: What have you seen or heard? Have you noticed any foul smells or debris in your fireplace? Sometimes, a trained eye can spot clues like nesting material or tracks nearby.
Once onsite, the pros will use flashlights, mirrors, or even small cameras to peek up the flue. This helps them learn:
What kind of animal family is inside—raccoons, squirrels, birds, or something else?
How many babies (and parents) are present?
Exactly where the nest is located—sometimes it’s within easy reach, and sometimes it’s way up high.
It’s a bit like detective work, but this careful approach makes sure everyone stays safe and calm during the next steps.
Gentle Hands: Safely Removing the Baby Animals
Now comes the part that takes the most patience. Unlike adult animals, babies can’t simply be “shooed out.” They’re fragile, and most can’t climb or fly on their own yet. The process for getting them out safely usually looks like this:
Careful Access: The team might open the damper or carefully remove a portion of the chimney cap—always with the goal of causing as little disruption as possible.
Gentle Extraction: Using gloved hands or soft, long-handled tools, the babies are gently lifted out. For birds, a small net may help. Squirrels or raccoons often require a secure, padded box to keep them cozy as they’re moved.
Reuniting With Mom: If the mother is present (and she usually is), she’s given a chance to collect her little ones herself. If not, the babies are placed in a safe, warm box near the chimney exit so she can find and move them after the disturbance is over.
The real trick is to be slow, quiet, and gentle so the animals experience as little stress as possible.
Next Steps: Relocating and Keeping Everyone Safe
After the babies are out, the focus shifts to relocation and prevention. The goal is always to keep families together and give them the best shot at survival. Here’s what happens:
Monitoring the Nest: If the mother is gone during removal, the babies are kept outside in a safe container until she returns. This reunification can take a few hours, so patience is key.
Safe Release: Once the family is back together, the animals are encouraged to relocate to a spot far from your home—sometimes with the help of a wildlife rehabilitator if needed.
Chimney Clean-Up: All leftover nesting material is removed, and the chimney is swept to get rid of debris, feathers, or fur.
Prevention: A sturdy chimney cap is installed to block any future “furry squatters.”
It’s not just about getting the animals out—it’s about making sure they don’t come back and that your fireplace is safe for use again.
Step
Purpose
Inspect chimney
Identify animals, number of babies, and nest location
Gently access nest
Avoid harming animals or damaging chimney
Carefully remove babies
Minimize stress and keep babies safe
Reunite with mother
Ensure family stays together for survival
Clean and secure chimney
Prevent future animal entry and fire hazards
“When it comes to wildlife in the chimney, every little life matters. Gentle hands and patience make all the difference—both for the animals and for your peace of mind.”
FAQs: Baby Animal Removal from Chimneys
Q: What if the mother animal isn’t there? A: If mom is out hunting or hiding, the babies are placed safely outside the chimney in a warm box. Usually, she’ll return within a few hours to move them herself. If she doesn’t, a wildlife rehabilitator is called in for care.
Q: Will the animals be harmed? A: Every step is designed to keep the animals safe and unharmed. Professional teams know how to handle them gently and are trained to deal with frightened or fragile babies.
Q: Can I just smoke them out or try to remove them myself? A: Never try to light a fire or poke around yourself—this can hurt or kill the animals and even damage your chimney. Leave it to the experts!
Q: How can I keep animals out in the future? A: The best way is to have a chimney cap installed and get regular inspections. This blocks entry while letting smoke out safely.
Conclusion
Dealing with baby animals in your chimney can be stressful, but with a gentle, step-by-step approach, everyone comes out unharmed. By inspecting first, carefully removing the babies, and making sure families are reunited, the pros keep your house safe and the local wildlife thriving. Don’t forget to secure your chimney afterwards—you’ll have peace of mind, and so will the animals! For anyone in Wenatchee, calling Wenatchee Chimney Sweep means you’re choosing kindness and safety for every living creature. That’s the heart of truly responsible Chimney Animal Removal.
https://rmconnection.com/wp-content/uploads/Wenatchee-Chimney-Sweep-3.jpg7361312wenatcheechimneysweep/wp-content/uploads/2020/02/logo-mockup-1.pngwenatcheechimneysweep2025-06-13 08:22:352025-06-13 08:23:21What Steps Are Taken To Remove Baby Animals During Chimney Animal Removal In Wenatchee?
If you live in Ann Arbor and regularly use a clothes dryer, there’s one tiny task that might be slipping through the cracks: cleaning out your dryer’s lint trap. It seems harmless to let it go “just this once,” especially when life is busy and laundry piles up. But here’s the thing—ignoring that fuzzy mess of lint can actually lead to some pretty big problems. From safety concerns to skyrocketing energy bills, the lint trap isn’t just a fluffy annoyance—it’s your dryer’s frontline defense. Let’s dig into why this small chore makes a huge difference, and how companies like Ann Arbor Dryer Vent Cleaning can help with Cleaning Dryer Lint Trap tasks before they turn into disasters.
1. Fire Hazards Start With a Fluffy Pile
Let’s get straight to the point: lint is flammable. That soft, innocent-looking fuzz is basically kindling. When it builds up in the lint trap and other parts of the dryer system, it turns your laundry machine into a fire risk. Dryers generate a lot of heat to get your clothes warm and toasty. If that heat doesn’t have a clear path to escape because lint is blocking the vents or filter, it can easily spark a fire.
According to fire departments across the country, thousands of dryer fires happen every year, and many of them start right in the lint trap. All it takes is one blocked vent and one overheating cycle. And let’s face it—Ann Arbor homes, especially older ones, might already have quirks in their wiring or ventilation systems. Why add to the risk?
2. Sky-High Energy Bills (And Slower Drying Times)
Ever notice how your dryer seems to be taking longer to dry the same load? That’s not your imagination—it’s likely a clogged lint trap slowing things down. When airflow gets blocked, your dryer has to work harder and longer to do the same job. It’s like trying to breathe through a straw while running. Not fun, right?
All that extra work doesn’t just waste time—it drives up your electric or gas bill, too. A simple 30-second cleaning of the lint trap after each load can make your dryer run more efficiently and save money in the long run. Plus, your clothes will thank you. Overheating and over-drying can wear them out faster, fading colors and shrinking fabrics.
3. More Wear and Tear on Your Dryer
Letting lint pile up isn’t just a fire or money problem—it’s a dryer lifespan problem. Think of your dryer like a runner. If it’s constantly out of breath from clogged filters, it’s going to break down faster. Motors overheat, belts snap, sensors fail. Repairs aren’t cheap, and replacements are even worse.
Routine lint trap maintenance helps your dryer last longer, work smoother, and avoid surprise repairs. Especially in Michigan’s unpredictable weather, the last thing you want is a busted dryer in the middle of a snowy week.
4. Mold and Musty Smells: Yep, That’s Lint Too
This one surprises a lot of people: trapped lint can actually hold moisture inside your dryer system. That damp, closed-off space creates the perfect environment for mold, mildew, and unpleasant smells. It’s not just about drying performance anymore—it’s about air quality and hygiene.
If your freshly washed clothes come out smelling less than fresh, your lint trap could be the hidden culprit. A blocked or neglected trap creates stale airflow, which turns your laundry routine into a frustration. Nobody wants to rewash clean clothes.
💡 Quick Comparison Table: What Happens When You Skip Lint Trap Cleaning
Consequence
What You’ll Notice
Long-Term Impact
Fire Risk
Burning smell, excessive heat
Possible dryer fire
Higher Energy Use
Longer drying times
Expensive utility bills
Appliance Damage
Dryer shuts off, strange noises
Costly repairs or early replacement
Mold and Smells
Musty clothes, damp dryer smell
Health issues, rewashing loads
FAQs About Dryer Lint Traps in Ann Arbor
Q: How often should I clean the lint trap? A: Every single time you use the dryer. Just pull it out and wipe the lint off with your fingers or a brush. It takes less than a minute.
Q: What if I already clean it—do I still need professional help? A: Absolutely. Lint can still sneak past the trap into the vent hose and the walls. Companies like Ann Arbor Dryer Vent Cleaning offer deep vent cleanings that cover what you can’t see or reach.
Q: Is it really that dangerous? A: Yes. Even a small spark near trapped lint can lead to a full-on fire. It’s one of the leading causes of home fires related to appliances.
Q: Can I use a vacuum to clean it? A: You can for light lint, but deep lint in the vent system needs special tools. That’s why professionals exist—they get it all out, safely.
“You wouldn’t drive your car without changing the oil, right? Well, your dryer needs that same kind of basic attention to keep working safely.”
Conclusion
Cleaning the lint trap in your dryer isn’t just a good habit—it’s a safety must, a money-saver, and a way to protect your home and appliances. Especially here in Ann Arbor, where temperatures swing and utilities fluctuate, your dryer needs to run clean and clear. If you’re not sure when you last cleaned the trap or the vents, it’s time to take a look—or better yet, let Ann Arbor Dryer Vent Cleaning handle the job. Don’t wait for a warning sign—stay ahead with regular Cleaning Dryer Lint Trap maintenance. Your clothes, your wallet, and your home will thank you.
https://rmconnection.com/wp-content/uploads/Ann-Arbor-Dryer-Vent-Cleaning-2.jpg7361312annarbordryerventcleaning/wp-content/uploads/2020/02/logo-mockup-1.pngannarbordryerventcleaning2025-06-13 05:00:592025-06-13 05:10:50What risks are involved in neglecting Cleaning Dryer Lint Trap in Ann Arbor?
Dryer lint traps don’t get much attention—until something goes wrong. If you’ve ever noticed your clothes taking forever to dry, a hot laundry room, or a slight burning smell from your dryer, chances are your lint trap is overdue for a deep clean. Living in Chesapeake, where homes often rely on their dryers year-round due to humidity or rainy weather, keeping that lint trap clean isn’t just about dryer efficiency—it’s about safety. That’s where having the right tools really makes a difference when it comes to cleaning dryer lint trap effectively. And if you ever feel it’s more than a DIY job, Chesapeake Dryer Vent Cleaning has your back.
Why Lint Trap Cleaning Is More Than Just “Removing the Fluff
Most folks think pulling out that fuzzy layer from the lint screen is enough. It’s not. Beneath the screen lies a pocket where fine dust, lint, and even pet hair settle and build up over time. This gunk slows down airflow and traps heat. Not only does this force your dryer to work harder (meaning higher electric bills), but it also becomes a fire hazard.
Keeping your lint trap truly clean involves a few easy steps—once you’ve got the right gear.
1. The Dynamic Duo: Vacuum Attachments + Lint Brushes
These are your must-haves. If you’re going to start anywhere, let it be here.
Lint Brushes – These long-handled, flexible brushes are designed to slide into the narrow opening where the lint screen sits. With soft but firm bristles, they scrape away stuck-on lint from hard-to-reach places. Think of it like brushing out knots from tangled hair—it takes a little effort, but the result is worth it.
Vacuum Hose Attachments – Pair the brush with a vacuum hose attachment that’s designed for narrow spaces. These kits usually come with a long hose that fits standard vacuums. Once you loosen the lint with the brush, you suck it all out with the hose.
“I used to think my dryer was just old and slow. Turns out, it just needed a proper lint trap clean-up. Now it runs like it’s brand new.”
2. Lint Trap Cleaning Kits: One-Stop Solution
Instead of buying brushes and hoses separately, many people go for all-in-one cleaning kits. These kits usually include:
Tool
Purpose
Best For
Flexible Lint Brush
Reaches deep into the trap housing
Manual scrubbing
Suction Hose Adapter
Connects to your vacuum
Pulling out loosened debris
Dryer Vent Snake
Navigates bends in venting systems
Deep interior cleaning
A bonus? Some of these kits are even designed to work with power drills, giving you extra scrubbing power with minimal elbow grease.
3. Microfiber Cloth + Dish Soap for a Simple Rinse
Once a month, it’s a good idea to rinse the actual lint screen with warm water and a drop of dish soap. You’d be surprised how much residue from dryer sheets or fabric softeners builds up on that screen—enough to block airflow.
All you need is:
A soft microfiber cloth
Warm water
A dab of dish soap
Scrub gently, rinse thoroughly, and let it dry completely before popping it back in.
4. Compressed Air Cans for the Sneaky Spots
Ever cleaned something and still felt like dust was hiding somewhere? That’s where compressed air cans shine. A quick burst of air can blow lint out of corners your brush can’t reach. This isn’t a primary cleaning method, but it’s a great finisher to knock out hidden particles.
FAQs: Quick Answers for Curious Minds
Q: How often should I clean my lint trap? A: Pull off the surface lint every time you dry a load. Deep clean it (with tools) once a month.
Q: Can I use my regular vacuum for this? A: Yes, just make sure you use a narrow hose attachment or get a dryer-specific kit.
Q: Why is my lint screen still dirty after brushing? A: It might have residue buildup. Try washing it with dish soap and water.
Q: Is it dangerous to leave lint in the trap too long? A: Absolutely. It’s one of the leading causes of house fires related to dryers.
Conclusion
Cleaning your dryer lint trap might seem like a small chore, but it has a big impact on your home’s safety and your dryer’s health. Whether you choose a brush, a vacuum attachment, or a full kit, what matters most is that you use them regularly and correctly. Don’t forget to clean not just the screen, but the cavity where it sits.
And if things ever feel out of hand—maybe you spot buildup in the vent pipe or behind the dryer—call in the local pros at Chesapeake Dryer Vent Cleaning. They’ll help make sure your system stays safe, efficient, and lint-free.
https://rmconnection.com/wp-content/uploads/Chesapeake-Dryer-Vent-Cleaning-3.jpg10241536chesapeakedryerventcleaning/wp-content/uploads/2020/02/logo-mockup-1.pngchesapeakedryerventcleaning2025-06-13 03:14:362025-06-13 03:22:58Which tools are recommended for Cleaning Dryer Lint Trap in Chesapeake?
Imagine sitting in your living room, enjoying some quiet time, and suddenly you hear scratching, rustling, or chirping from the chimney. Sounds like a horror movie? Not quite—but it could mean you have an uninvited animal guest nesting in your flue. Birds, squirrels, raccoons, and even bats can make their way inside and turn your chimney into their temporary home. While it might seem like a minor issue, it can actually create fire hazards, health risks, and costly repairs. If you’re facing this situation, here’s how to choose the best chimney animal removalin Winston Salem and get things sorted quickly and safely.
What Kind of Animal Is It?
First, observe. You don’t need to look inside the chimney—just pay attention to the sounds and smells. Do you hear chirping early in the morning? That could mean birds. Noises at night? Possibly raccoons. A foul smell might signal something more serious.
“Knowing the type of critter helps us use the safest and most effective removal method.”
Choose a Specialist—Not Just Any Pest Control
Many general pest control services don’t have the training or equipment for chimneys. You want a company that knows how chimneys work and how animals behave inside them. Look for:
Certified and insured teams
Experience with chimney structures and wildlife
Humane removal methods
Familiarity with state wildlife laws and protected species (like chimney swifts)
A well-trained team can remove the animal safely and prevent it from returning—without damaging your chimney in the process.
Don’t Skip the Cleanup and Prevention Steps
The removal is only half the job. Animals leave behind nests, droppings, and sometimes damage to the flue liner or smoke shelf. After removal, the company should:
Clean the chimney interior
Remove all nesting material
Deodorize and sanitize, if needed
Repair any small damages
Install a chimney cap or screen
Without these steps, another animal could easily move in again—especially during the next breeding season.
Ask Around and Do a Little Research
Winston Salem is a close-knit community. Ask neighbors if they’ve dealt with similar issues. Check online reviews and testimonials. A trustworthy chimney animal removal service will have:
Transparent pricing
Great customer service
Good communication
Positive feedback from local homeowners
When in doubt, give them a call and ask questions. How they treat you over the phone is usually a good preview of what you can expect on the job.
What to Look for in Chimney Animal Removal Services
Feature
Why It Matters
Winston Salem Chimney Sweep
Humane Removal Methods
Safe for animals and legally compliant
✅ Yes
Specialized Chimney Experience
Knowledge of chimney structure and access
✅ Yes
Clean-Up and Damage Repair
Ensures chimney is safe and functional again
✅ Yes
Chimney Cap Installation
Prevents animals from coming back
✅ Yes
Local Wildlife Law Knowledge
Complies with protections for native species
✅ Yes
Frequently Asked Question
Q: Can I light a fire to drive the animal out? A: No. That’s extremely dangerous for both the animal and your home. It can cause the animal to panic and block the chimney, increasing the risk of smoke or carbon monoxide backing up into your house.
Q: Are chimney swifts protected? A: Yes, chimney swifts are federally protected and cannot be removed during nesting season. Professionals will know how to legally and safely handle the situation.
Q: How do I keep this from happening again? A: A chimney cap with a mesh screen is the best prevention. It keeps animals, debris, and even rain from entering your chimney.
Q: Is this covered under regular chimney cleaning services? A: No. Animal removal is usually a separate service that requires different tools and skills.
Final Thoughts
A noisy chimney is more than just a minor annoyance—it’s a warning sign. Whether it’s nesting birds or a curious raccoon, acting fast and choosing the right experts will save you time, money, and stress. For homeowners in Winston Salem, Winston Salem Chimney Sweep offers the trusted, humane, and chimney-safe solutions you need. So when it comes to chimney animal removal in Winston Salem, don’t take chances—choose the pros who know what they’re doing.
https://rmconnection.com/wp-content/uploads/Winston-Salem-Chimney-Sweep.jpg7361312winstonsalemchimneysweep/wp-content/uploads/2020/02/logo-mockup-1.pngwinstonsalemchimneysweep2025-06-12 05:06:502025-06-16 22:38:42How To Choose The Best Chimney Animal Removal In Winston Salem
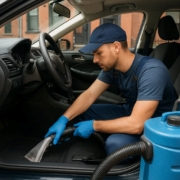
Everyday life is tough on your car’s carpet. With constant foot traffic, snack spills, pet fur, and muddy shoes, it doesn’t take long for it to get dirty and start smelling less than pleasant. While a quick vacuum might pick up surface dirt, it won’t handle what’s deep in the fibers. That’s why many car owners in Brooklyn rely on professional help. Local services like Brooklyn Carpet Cleaning use different cleaning methods based on the mess and carpet condition. If you’re curious about how they bring your interior back to life, here’s how the pros approach car carpet cleaning.
1. Vacuuming That Goes Way Beyond the Basics
Step one is always vacuuming—but not the kind you do at home. This is heavy-duty, industrial suction that lifts all the sand, dirt, pet hair, and crumbs buried in your car’s carpet. The pros will slide the seats, pull out the mats, and reach all those tight corners that most people skip.
This stage clears the way for deeper cleaning methods to work effectively. In Brooklyn, where cars pick up dirt from slushy winters and dusty summers, this step alone can make a big difference.
2. Steam Cleaning for Deep, Natural Results
Steam cleaning is one of the most popular go-to methods. Using high-temperature steam, this process loosens up grime trapped in the carpet fibers. Then a powerful extractor pulls it all out, leaving the carpet cleaner and sanitized.
It works well for:
Stains from coffee or soda
Mud tracked in from sidewalks
Salt buildup during winter
Allergens and bacteria
Plus, it doesn’t rely on harsh chemicals—just heat and water. Perfect for Brooklyn drivers who prefer eco-friendly cleaning.
3. Foam and Shampoo Treatment for Tough Stains
When carpets need more than a refresh, foam or shampoo cleaning steps in. A cleaning solution is applied and agitated into the fabric with a brush or machine. This helps lift deeper dirt, old stains, and even smells. Afterward, the foam and grime are extracted together.
This is a great choice for:
Older vehicles that haven’t had a deep clean in years
Persistent odors
Messes from pets or food
While it takes longer to dry than steam, it delivers a fresh scent and deep-down clean that’s hard to beat.
4. Spot Treatments for Those Problem Areas
Every car has that one spot. Maybe it’s where a juice box exploded or the dog had an accident. Instead of cleaning the entire carpet, professionals often isolate the area with a stain-specific treatment.
Depending on the type of stain—oil, ink, pet mess, etc.—the cleaner uses the right solution to break it down before gently scrubbing and extracting. Done right, you won’t even remember where the spot was.
Quick Guide to Common Car Carpet Cleaning Methods
Cleaning Method
Best For
Drying Time
Advantages
Drawbacks
Industrial Vacuuming
Loose dirt, pet hair
Instant
Essential first step, fast cleanup
Doesn’t remove stains
Steam Cleaning
General deep cleaning
2–4 hours
Eco-friendly, sanitizes fabric
May not remove heavy stains
Foam/Shampoo Cleaning
Odors, deep-set grime
4–6 hours
Deep clean, leaves fresh scent
Longer dry time
Spot Treatment
Isolated, tough stains
Varies
Targeted cleaning for tricky messes
Not for full-carpet refresh
“A clean car isn’t just about looks—it’s about breathing easier, feeling good behind the wheel, and actually enjoying your drive again.”
FAQs: Car Carpet Cleaning in Brooklyn
Q: Is vacuuming enough for regular car carpet maintenance? A: Vacuuming is a great start, especially for loose dirt and pet hair. But for odors, stains, or built-up grime, a deeper clean is needed.
Q: How often should I get my car carpets professionally cleaned? A: Twice a year works for most drivers. But if you have young kids, pets, or a long commute through Brooklyn’s busy streets, every 3–4 months might be better.
Q: Can steam damage the carpet or padding? A: When done properly with the right equipment, steam cleaning is safe. It actually helps extend the life of your carpet by removing harmful debris.
Q: How long do I need to wait before using the car again? A: After steam or shampoo cleaning, it’s best to wait a few hours for everything to dry. Keeping windows cracked can help speed it up.
Conclusion
A clean car interior isn’t just about appearances—it makes driving more pleasant and keeps your vehicle in better shape over time. Whether you just need a quick vacuum or a full-on shampoo session, local pros like Brooklyn Carpet Cleaning have the tools to handle it all. If your vehicle’s carpet has seen better days, now’s the perfect time to refresh it with expert car carpet cleaning that actually makes a difference.
https://rmconnection.com/wp-content/uploads/Brooklyn-Carpet-Cleaning.jpg10241536brooklyncarpetcleaning/wp-content/uploads/2020/02/logo-mockup-1.pngbrooklyncarpetcleaning2025-06-12 04:05:042025-06-12 04:05:09Which methods are used for Car Carpet Cleaning in Brooklyn?
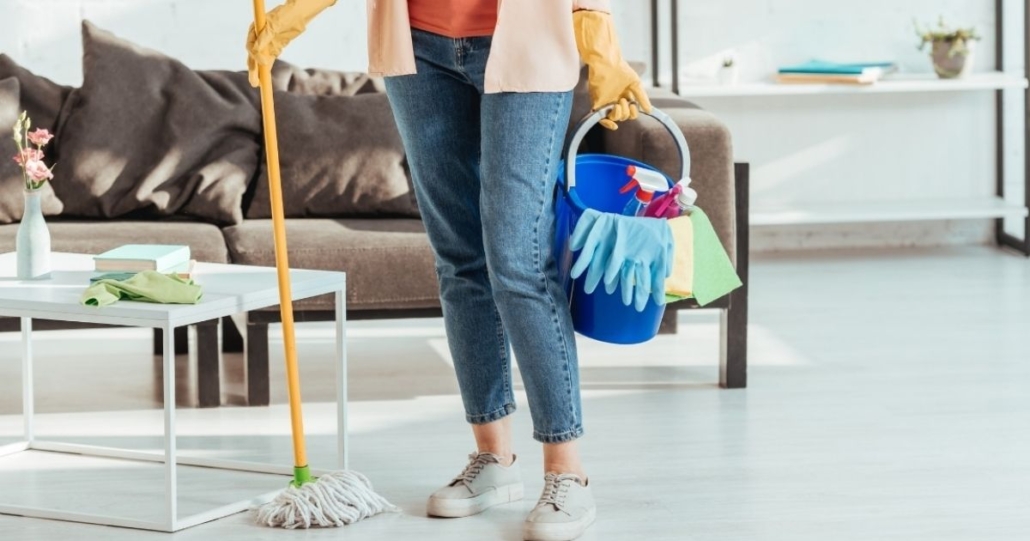
G’day, my mates! Remember last year when I announced I was packing up my entire life and moving to Auckland for that job opportunity? Well, I’m a full year into my Kiwi adventure, and let me tell you—settling into Auckland brought challenges I never saw coming. Today, I’m sharing the unglamorous truth about one aspect no one warns you about: keeping your new Kiwi dwelling properly clean without losing your mind.
Unlike those perfectly curated Instagram posts of happy expats on beaches (guilty as charged—I’ve posted a few myself), I’m here on good old LiveJournal to spill the proper tea about the cleaning nightmares I faced and how I finally sorted them. Because if there’s anywhere we can be honest about domestic disasters, it’s here, right?
The “Nobody Warned Me About This” Cleaning Shocks
First off, did you know Auckland welcomed over 32,000 expats last year? That’s a lot of us foreigners learning the hard way that our previous cleaning habits just don’t cut it here. I certainly didn’t anticipate becoming obsessed with cleaning products within my first month, but here we are.
My gorgeous harbour-view apartment (which I absolutely bragged about in my first post) quickly revealed its dark secrets:
The Black Mould Invasion: The bathroom ceiling started developing these sinister black spots within weeks. My initial reaction? Panic that I’d done something terribly wrong. Turns out Auckland’s humidity is the perfect breeding ground for mould, and it’s a common expat surprise.
Hard Water Hell: Those cloudy spots on my shower screen and taps? Not my imagination or poor cleaning skills. Auckland’s water hardness level makes mineral deposits a constant battle.
The Salt Spray Phenomenon: Living near the coast sounds dreamy until you realise everything—and I mean EVERYTHING—gets coated in a fine layer of salt. My windows looked like they’d never been cleaned, even when I’d just done them the day before.
After several failed attempts at sorting these issues myself (including that disaster with the vinegar solution that left my entire apartment smelling like a fish and chip shop), I finally admitted defeat. My cleaning methods from back home were about as useful as a screen door on a submarine.
How I Finally Got My Cleaning Act Together
The turning point came after a particularly mortifying incident involving my new boss dropping by unexpectedly. Let’s just say seeing someone’s reaction to mysterious bathroom ceiling spots while you’re still trying to make a good impression at work is character-building.
Through the expat grapevine (by which I mean the extremely helpful Auckland Expats Facebook group), I kept hearing about this cleaning service called Premium Clean. Apparently, they’re like the secret weapon for newcomers. After my boss incident, I was desperate enough to give them a go.
Here’s why they’ve become my Auckland lifeline:
They Actually Understand Expat Problems
The biggest revelation was having cleaners who immediately knew what I was on about without lengthy explanations. When I pointed frantically at my windows and made incoherent noises about “always being streaky,” the cleaner just nodded and said, “Salt spray. We’ll use the special solution.”
They have this brilliant thing called the “New Kiwi Starter Pack” that targets all the specific cleaning nightmares expats face:
Kitchen Reset: My oven had suspicious crusty bits from previous tenants that no amount of scrubbing could touch. Their professional cleaning made it look new, and they tackled those weird, hard water marks on everything.
Wardrobe Organisation: Seems random until you experience Auckland’s “four seasons in one day” weather pattern. They reorganised my storage for the climate reality here, which I wouldn’t have figured out until at least another year of seasonal clothing disasters.
Bathroom Deep Clean: They didn’t just clean my bathroom; they educated me on preventing future mould and mineral buildup issues. Game-changer.
They Speak Your Language (Literally)
One of my biggest struggles was explaining specific cleaning concerns with my limited vocabulary for cleaning terms. Try explaining “grout” or “limescale” when you don’t know the local terminology!
Premium Clean’s team includes people from diverse backgrounds, and their customer service offers explanations in multiple languages. When I couldn’t articulate exactly what I needed, they didn’t make me feel like a complete drongo. Instead, they provided written cleaning standards documentation that cleared everything up.
The Cultural Cleaning Differences No One Talks About
Here’s something they don’t mention in the “Moving to New Zealand” brochures: cleaning standards and expectations here are possibly different from what you’re used to. I learned this the hard way during my first property inspection.
In Auckland, landlords and property managers have specific expectations, especially regarding:
Mould prevention (it’s considered your responsibility!)
Water conservation practices while cleaning
Eco-friendly product preferences
End-of-lease cleaning standards that would make a military inspector weep
Premium Clean actually educated me about these differences. They explained seasonal cleaning needs (winter mould prevention is a whole thing here) and local tenancy cleaning requirements. This information alone was worth every dollar—it potentially saved me from losing my bond when I eventually move.
The Flexibility That Saved My Sanity
During those first chaotic months of settling in, my schedule was absolute madness. Job hunting, sorting banking, finding a doctor, learning to drive on the wrong side of the road—adding “figure out complex new cleaning challenges” to that list felt impossible.
What worked brilliantly was their flexible approach:
I started with a one-off deep clean when I first moved in
Then switched to a regular fortnightly schedule once I was settled
Added special seasonal cleans for specific issues (pre-winter mould prevention)
When I had that unexpected job interview at home (thanks, COVID protocols), they arranged an emergency clean with just 24 hours’ notice. Absolute lifesavers.
The Transparency That My Budget Appreciates
Let’s be honest—moving countries demolishes your budget. The last thing you need is surprise expenses or confusing pricing structures.
One thing I genuinely appreciated was their transparent pricing. No hidden fees, no sudden “oh but that’s extra” moments. They provided:
Clear upfront quotes
Package options that made financial sense
New resident promotions (yes, they have special deals for us clueless newcomers!)
For someone still getting used to mentally converting everything to NZD, this straightforward approach was refreshing.
Beyond Just Cleaning: Building My Auckland Support Network
This might sound weird, but having regular cleaners became part of building my support network here. They’ve become my go-to source for local knowledge about:
How to handle seasonal challenges (dehumidifiers in winter are essential, apparently)
Referrals to other services (their recommendation for a plumber saved me during The Great Pipe Disaster of 2023)
Updates about local requirements and changes
When you’re far from home, these connections matter enormously. The cleaning team notices when something’s not right in your home before you might, like when they pointed out a small water leak that could have become a massive problem.
The Environmental Side I Wasn’t Expecting
New Zealand takes environmental responsibility seriously—much more than I was used to. Premium Clean aligns perfectly with this cultural value, using:
Biodegradable cleaning solutions
Water-efficient techniques
Locally sourced products
Minimal packaging
It helped me adjust to the eco-conscious culture here. I’ve found myself adopting these practices in other areas of my life, too.
For Those “Oh No!” Moments
We’ve all had those expat panic moments. Mine involved realising the property manager was coming for an inspection THE NEXT DAY, while I was hopelessly behind on cleaning.
Premium Clean offers:
24/7 emergency response
Same-day availability when possible
Quick deployment for urgent needs
Just knowing this option exists reduces my everyday stress levels significantly.
The LiveJournal Truth: It’s Worth Every Cent
Unlike those Instagram influencers pushing cleaning products they’ve never used, I’m here on LiveJournal to give you the unvarnished truth: professional cleaning services in Auckland aren’t a luxury for expats—they’re practically a necessity.
Between the unique environmental challenges, different standards, and cultural expectations, having experts handle it during your adjustment period makes the difference between struggling and thriving.
Premium Clean transformed my Auckland experience from “why is everything growing mould?!” to actually enjoying my new home. Their attention to detail covered everything from carpet cleaning to window treatments specifically designed for coastal properties.
Your Turn, LJ Friends!
For my fellow expats out there (whether in NZ or elsewhere), what cleaning surprises did your new country throw at you? Any disasters to share? And for the Auckland crowd, any specific cleaning tips for our unique environment?
If you’re planning a move to Auckland, don’t hesitate to reach out with questions. I’m one year into this adventure and happy to share more unglamorous truths about expat life that you won’t find in the glossy relocation guides!
Until next time, keep your dehumidifiers running and your cleaning services on speed dial!
~KiwiConverted
PS: If you’re wondering about Premium Clean specifically, they make getting started super simple. They offer free initial consultations,customisedd quotes, flexible scheduling, and multilingual support. Your Auckland adventure deserves a clean start, right?
https://rmconnection.com/wp-content/uploads/91.jpg6301200premiumclean/wp-content/uploads/2020/02/logo-mockup-1.pngpremiumclean2025-05-27 05:41:002025-05-27 05:41:05My Auckland Survival Guide: How I Found the Holy Grail of Cleaning Services as a Bewildered Expat
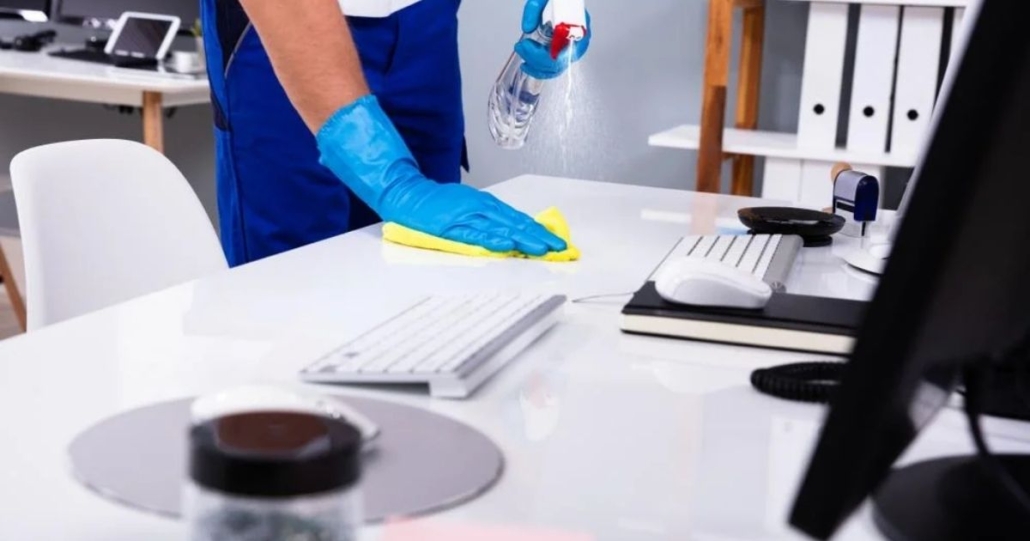
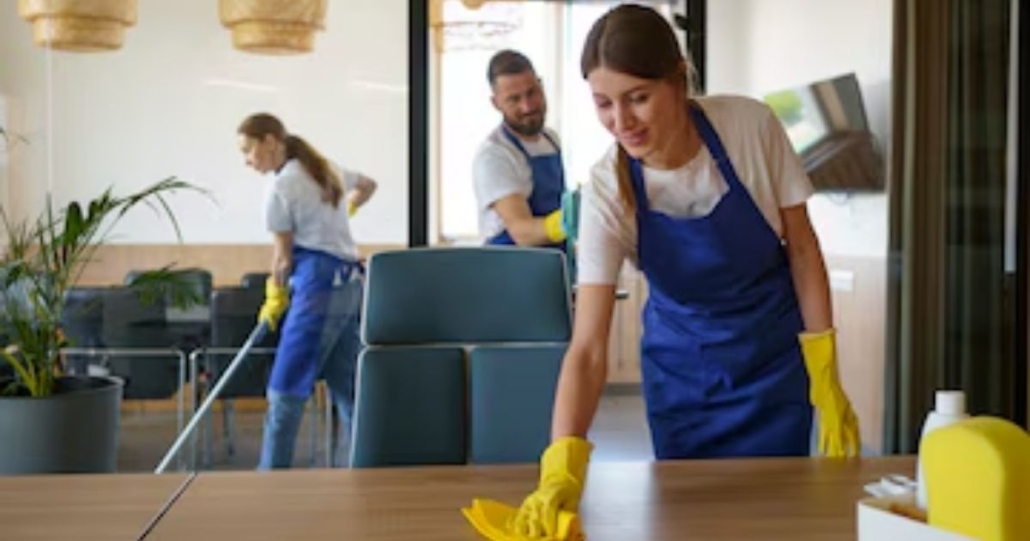
Moving is a major life event, and whether you’re leaving an apartment or settling into a new home, the process can be both exciting and stressful. One of the most critical steps in this journey is ensuring the property is spotless, especially if you want to secure your security deposit. This is where professional Move-In/Move-Out Cleaning services and a thorough Move-In/Move-Out Cleaning checklist become invaluable.
Why Move-In/Move-Out Cleaning Matters
For renters, the return of a security deposit often depends on the condition in which the property is left. Landlords and property managers expect the home to be as clean as it was when you moved in, if not cleaner. Any overlooked dirt, grime, or damage can result in deductions from your deposit. For homeowners, a clean slate is essential for a fresh start or for impressing potential buyers.
Move-In/Move-Out Cleaning services specialize in deep cleaning every nook and cranny, ensuring nothing is missed and giving you the best chance of passing the final inspection with flying colors.
The Hidden Benefits of Move-In/Move-Out Cleaning
While the primary goal is often to reclaim your deposit, there are several additional advantages to investing in professional Move-In/Move-Out Cleaning:
Time Savings: Moving is exhausting. Delegating the cleaning allows you to focus on packing, paperwork, and settling into your new space.
Stress Reduction: Knowing that experts are handling the cleaning provides peace of mind and reduces anxiety about meeting landlord expectations.
Health and Safety: Deep cleaning eliminates dust, allergens, and germs, creating a healthier environment for the next occupants or for your own family.
Positive References: Leaving a property in pristine condition can help you secure good references for future rentals.
Increased Property Value: For sellers, a spotless home can make a significant difference in attracting buyers and achieving a higher sale price.
Move-In/Move-Out Cleaning Checklist
A comprehensive Move-In/Move-Out Cleaning checklist ensures that every area is addressed, minimizing the risk of missed spots that could cost you part of your deposit. Here’s an expert-backed checklist to guide your cleaning process:
General Cleaning Tasks (All Rooms)
Dust light fixtures, fans, and vents.
Clean windows, window sills, and tracks.
Wipe down walls, doors, and door knobs.
Vacuum and mop floors.
Dust baseboards and crown molding.
Remove cobwebs from ceilings and corners.
Wipe down switch plates and outlets.
Remove all trash and personal belongings.
Patch nail holes and touch up paint if necessary.
Kitchen Cleaning Checklist
Clean inside, outside, and behind all appliances (refrigerator, stove, oven, microwave, dishwasher).
Defrost freezer and clean fridge shelves and drawers.
Scrub oven interior, racks, and stovetop burners.
Clean range hood and filters.
Wipe down countertops, backsplashes, and cabinet fronts.
Clean inside drawers and cabinets.
Disinfect sinks and clean garbage disposal.
Mop and sanitize floors.
Clean light fixtures and switches.
Bathroom Cleaning Checklist
Scrub and disinfect toilets, tubs, and showers (pay special attention to grout and hard water stains).
Clean mirrors and glass surfaces.
Wipe down countertops, shelves, and cabinets (inside and out).
Clean sinks and faucets.
Remove mold or mildew from tiles and grout.
Wash or replace shower curtains.
Mop and disinfect floors.
Wipe down towel racks and fixtures.
Bedroom and Living Area Checklist
Vacuum carpets and/or mop floors.
Clean and dust closets, shelves, and rods.
Wipe down furniture surfaces (if any remain).
Clean mirrors and windows.
Remove stains from walls and spot clean as needed.
Dust blinds and clean window treatments.
Clean behind and under any remaining furniture.
Additional Areas
Laundry Room: Clean and disinfect surfaces, washing machine filter, dryer lint trap, and exteriors of appliances.
Garage: Sweep, remove trash, and clean up spills.
Patio/Balcony: Sweep, wipe down railings, and remove decorations or debris.
Entryways and Hallways: Dust, mop, and ensure all surfaces are clean.
Pro Tips for a Deposit-Ready Clean
Empty the Space First: Cleaning is most effective when the home is empty, allowing access to every corner.
Work Top to Bottom: Start with higher surfaces (light fixtures, shelves) and finish with floors to avoid re-cleaning.
Don’t Forget Details: Pay attention to often-missed areas like baseboards, window tracks, and behind appliances.
Use the Right Supplies: Gather all-purpose cleaners, disinfectants, microfiber cloths, sponges, vacuum, mop, and specialty products for tough stains.
Document Your Work: Take before-and-after photos to provide proof of the property’s condition, which can be helpful if there are disputes with your landlord.
How Move-In/Move-Out Cleaning Services Help Secure Your Security Deposit
Professional cleaning services are experts in meeting landlord and property manager standards. Here’s how they can make a difference:
Thoroughness: Professionals follow detailed checklists and know exactly what landlords look for during inspections.
Efficiency: Experienced cleaners work quickly and systematically, ensuring nothing is missed and deadlines are met.
Accountability: Many services guarantee their work, offering to re-clean if the landlord isn’t satisfied.
Specialized Equipment: Access to industrial-grade vacuums, steam cleaners, and stain removers ensures a deeper clean than most DIY efforts.
By investing in Move-In/Move-Out Cleaning, you maximize your chances of getting your full security deposit back—often offsetting the cost of the service itself.
Frequently Missed Areas That Can Cost You
Even diligent DIY cleaners can overlook key areas that landlords inspect closely:
Inside appliances (especially oven, fridge, and dishwasher)
Behind and under appliances
Window tracks and blinds
Bathroom grout and hard water stains
Baseboards and door frames
Light fixtures and ceiling fans
Closets and storage areas
Professional Move-In/Move-Out Cleaning services are trained to catch these details, ensuring your property is truly move-in ready.
Move-In/Move-Out Cleaning for New Tenants
If you’re moving in, a deep clean is just as important. Previous occupants may not have cleaned thoroughly, and a fresh start ensures your new home is hygienic and welcoming. Consider using the same Move-In/Move-Out Cleaning checklist to prepare your new space.
Conclusion
Securing your security deposit is about more than just surface-level tidiness. It requires a comprehensive, detail-oriented approach that addresses every part of the property. By following a thorough Move-In/Move-Out Cleaning checklist and considering professional Move-In/Move-Out Cleaning services, you’ll leave your old home spotless, impress your landlord, and maximize your chances of a full refund.
Don’t let cleaning be the reason you lose out on hundreds or even thousands of dollars. Plan ahead, use the checklist above, and let the experts handle the rest—so you can focus on your next adventure with peace of mind.
https://rmconnection.com/wp-content/uploads/Plan-a-Deep-house-cleaning-for-special-mother-day_1_11zon.webp6281200maidincarmel/wp-content/uploads/2020/02/logo-mockup-1.pngmaidincarmel2025-04-18 15:52:472025-04-18 15:53:01How Move-In/Move-Out Cleaning Can Help You Secure Your Security Deposit