Repair Log Cabin Rot: Expert Techniques for Long-Lasting Results
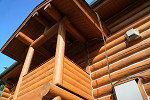
Log cabins have this undeniable charm. That rustic vibe, the smell of cedar or pine, the feeling of stepping back in time—it’s magic. But here’s the kicker: all that beauty comes with some serious upkeep. One of the biggest headaches for cabin owners? Rot. Yeah, rot. That sneaky, slow-moving destroyer that loves hiding in the corners, behind logs, or under eaves. If left unchecked, it can eat away at your investment and turn your dream cabin into a nightmare.
Repairing log cabin rot isn’t just about slapping on some wood filler and calling it a day. It takes know-how, patience, and a little elbow grease. Let’s talk straight about how to tackle rot properly and get long-lasting results.
Understanding the Enemy: How Rot Forms
Before you even think about repair log cabin rot, you need to understand what you’re dealing with. Rot isn’t just wood looking old or a bit damp—it’s decay caused by fungi feeding on the wood. Moisture plus time equals rot. And in a log cabin, where moisture loves to sneak into cracks, gaps, and corners, it can happen fast.
There’s two main types to watch for: dry rot and wet rot. Dry rot can spread fast and weakens the wood structurally. Wet rot is more local but still a pain. Both types compromise the logs and, if ignored, can eventually affect the roof and foundation.
The first step in repair log cabin rot is identifying it early. Check logs for soft spots, discoloration, or a musty smell. Look especially around windows, doors, and the base of the cabin. If you poke with a screwdriver and it goes in too easily—yep, you’ve found trouble.
Step One: Removing the Damaged Wood
You can’t just paint over rot and hope it goes away. That’s a rookie mistake. For proper log home repair and restoration, you need to remove the damaged wood.
Use a chisel, saw, or rotary tool to cut out all the soft, crumbling bits. Go a little beyond the obviously damaged area—fungus can lurk where you don’t see it. And don’t skimp. Leaving a tiny patch of rot is basically leaving the door open for it to come back.
Once you’ve removed the rot, vacuum or brush out the sawdust. You want a clean surface before the repair. Any leftover debris, moisture, or mold can make your fix fail later.
Step Two: Treat the Remaining Wood
Even the wood that looks solid can harbor spores. Applying a wood preservative or fungicide is key. This kills the remaining fungus and prevents new rot from forming.
Make sure to get deep into cracks, grooves, and any nooks where moisture hangs out. Let it dry properly. Skipping this step? Big mistake. You’ll just be patching the same rot again in a year or two.
Step Three: Filling the Void
Now comes the fun part: filling. You’ve got a clean, treated hole. Time to bring it back to life. There are a few options here, depending on the size of the rot:
- Epoxy wood fillers: These are great for small to medium areas. They harden solid and can be sanded or stained to match the surrounding log.
- Wood plugs or Dutchman repairs: For larger sections, you might need to cut a new piece of wood to fit. This is more involved but looks natural and lasts longer.
- Chinking or log repair compounds: Some blends combine epoxy and wood fibers to fill irregular spaces effectively.
The goal is a strong, stable surface that blends in with the rest of the log. Don’t rush. Let each layer cure properly if you’re building it up.
Step Four: Sanding, Sealing, and Finishing
After the filler or repair piece is set, sand it down so it’s flush with the surrounding log. This isn’t just cosmetic. Smooth surfaces shed water better and reduce the chance of rot returning.
Next, seal the wood. A high-quality log sealant or stain protects against moisture, UV rays, and pests. Reapply every few years. Think of it like sunscreen for your cabin—it keeps it strong and looking good.
Maintenance Tips to Keep Rot Away
Here’s the truth: repair log cabin rot is only part of the battle. Prevention is just as important.
- Keep gutters clean and direct water away from logs.
- Check for leaks around windows, doors, and the roofline.
- Trim back vegetation so air can circulate around the cabin.
- Re-stain or seal every few years to maintain that protective barrier.
These might seem like small things, but small neglect leads to big rot. Regular inspection is key—catch a problem early, and your repair is easier and cheaper.
When to Call in the Pros
Some rot is just too extensive to DIY. If structural logs are compromised, if the rot spreads over large sections, or if you’re unsure how deep it goes—don’t gamble. Professional log house restoration experts have the tools and experience to do it safely.
They can also recommend advanced techniques, like wood consolidation or specialized preservatives, that go beyond what most homeowners can do on their own. It’s an investment, but think of it as insurance for your cabin.
Conclusion: Long-Term Success
Log cabins are beautiful, durable, and full of character—but they demand attention. Repair log cabin rot the right way, and your cabin will last generations. Cut out the damaged wood, treat the remaining structure, fill and seal properly, and keep up with maintenance.
Don’t cheat. Don’t take shortcuts. Rot is patient—it waits for mistakes. But with a bit of work, some elbow grease, and a clear plan, you can protect your cabin, preserve its charm, and keep it standing strong. Your log cabin is an investment. Treat it like one.
Leave a Reply
Want to join the discussion?Feel free to contribute!